|
| Windows 8 |
Windows 8 may prove to be Microsoft's most secure Operating System to date. The company began repairing its dismal reputation for security with Windows 7; the latest version takes many significant steps to provide a more secure operating environment for PCs.
The final, Release to Manufacturing (RTM) version of Windows 8 is now available to developers, IT professionals and businesses with volume licences.Now that Microsoft's Windows 8 operating system has hit the release-to-manufacturing (RTM) stage, it's time to see how it stacked up against the incumbent Windows 7.
 |
| Windows 8 |
 |
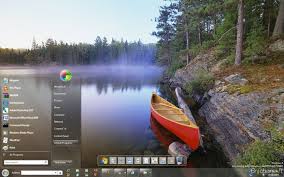
Windows 8 Desktop
Beautiful,isn't it?
|
 |
| Windows 8 Desktop with Superbar |
Here are some Benchmarks that i gathered from the internet.
The hardware
The following purpose-built hardware platform was used for benchmarking the two operating systems:
Intel Core i7-3960X processor
16GB of DDR3-1866 memory
GeForce GTX 670 graphics card
Asrock X79 Extreme11 motherboard
Samsung Spinpoint F1 1TB (primary drive)
Kingston SSDNow V+ 200 256GB SSD (Windows Explorer Test)
Operating Systems Used:Windows 7 Ultimate SP1 64-bit and Windows 8 Pro (64-bit)
So here is how Windows 8 pitted against Windows 7:
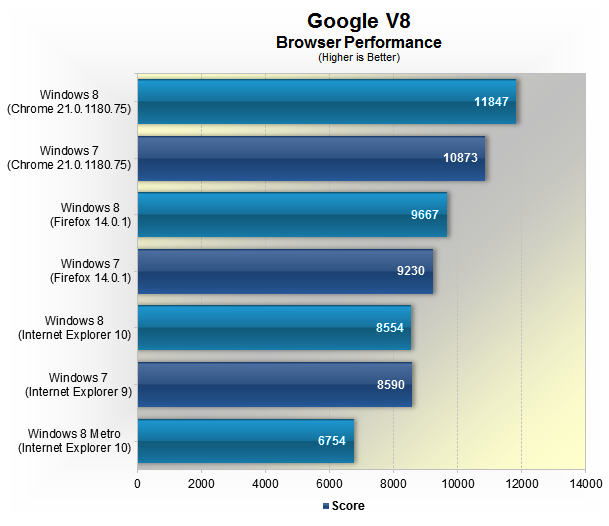
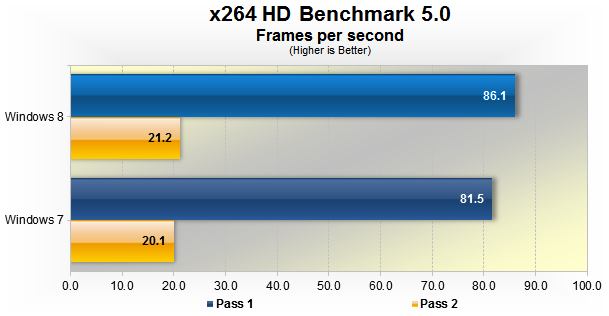
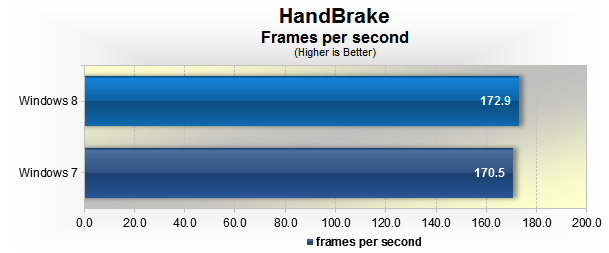
Benchmarks: Boot Up, PCMark, Browser, Encoding
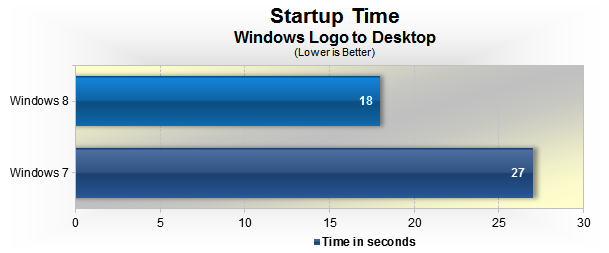 |
| Clearly Windows 8 is Faster!! |
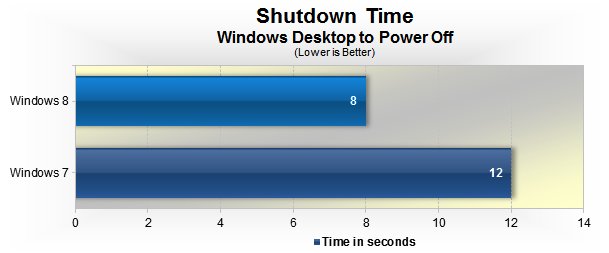 |
| Windows 8 wins in this category |
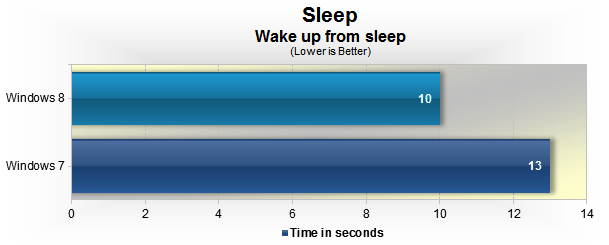 |
| Windows 8 wins this category |
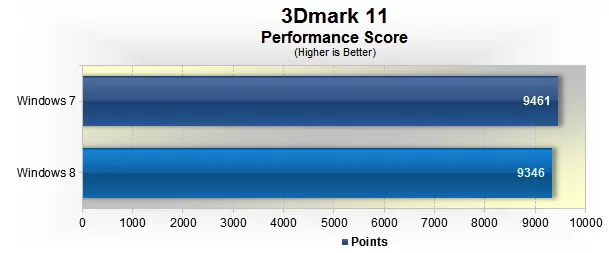 |
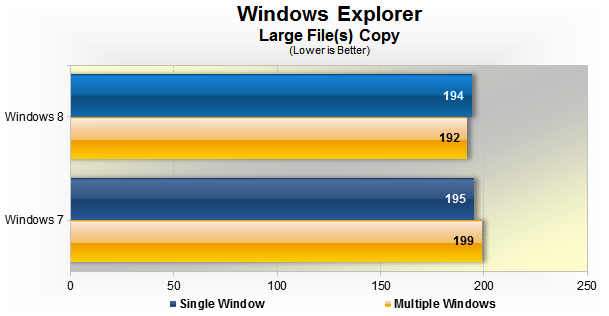
| Windows 7 wins here! |
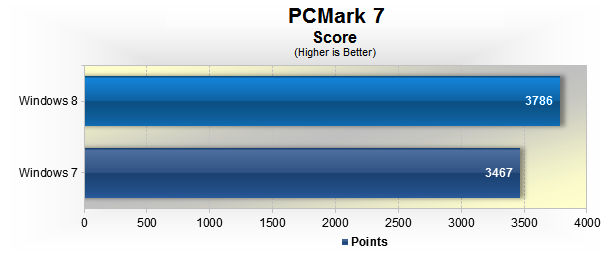 |
| Winner here is Windows 8 |
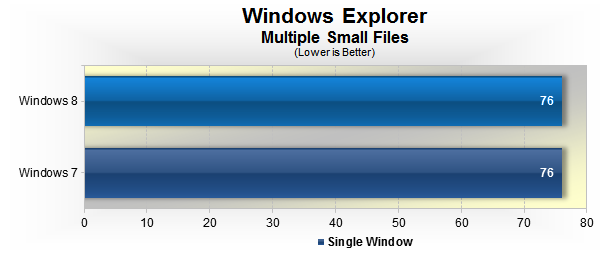
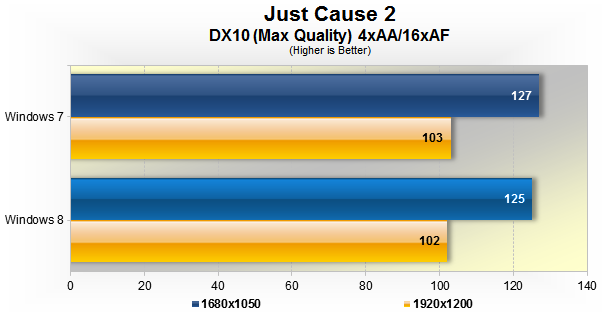
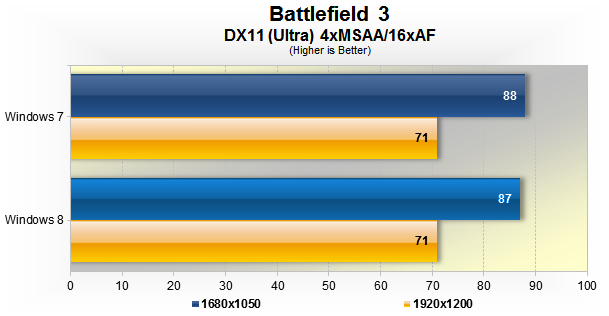
Benchmarks: File Copy, Gaming
It's often been the case with new Windows OS releases that it takes some time before performance is up to par or above the level of its predecessor. The best example was the move from Windows XP to Windows Vista.
But in this case,from a performance standpoint Windows 8 appears to offer a solid foundation from the get-go. Although there are only a few select areas where it is faster than Windows 7, it is pleasing to know that it's able to match it everywhere else.
Also, Windows 8 appears more polished than Windows 7.
So what would you prefer to use:Windows 7 or Windows 8?
It seems that Windows 8 is more optimised for the user than Windows 7.